Tuesday, April 13, 2010
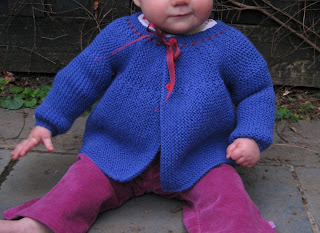
Summer top finished. Just in time for WInter.
Thursday, April 8, 2010
My creative space
of the future...
We are moving house later this year. Plans are well underway for an extension and a renovation (that our little family will have the pleasure of living through!) And I am very excited about my new 'creative space' that is in the plans (above pic may be difficult to inperpret, unless you are me and spend A LOT of time staring at this little line drawing - The grey shaded bit in inside the house, you can see the windows opening to the outside. My creative space of the future is really just a length of desk, but imagine the possibilities!).
It will have nice big windows overlooking our backyard. Particularly looking out at an existing White Cedar (scientific name Melia azedarach - Persian Lilac) and the rest of a lush garden (that will be there eventually). But at the moment it just looks like this - a tree (a nice one at that) and some grass.
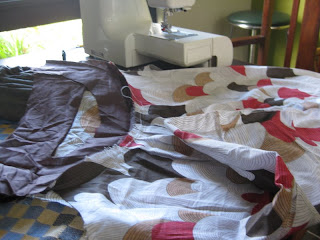
On a more practical level, this is what I am working on at the moment. Finishing off a cool breezy summer top I started last year (not much of a need for it this time of year, but hopefully I will have finished it before next summer...)
Visit Kootoyoo for more in the present creative spaces...
Thursday, March 18, 2010
My creative space
Take 1 op shopped skivvy. Add a couple of squares of polar fleece in a warm wintry pattern.
Monday, March 15, 2010
A little time out and a crafty embellishment
I did, however, finish this project before I went into hospital. This was one of my op shopped finds that needed some crafty love to fix a lame decoration. The production line flowers were unpicked, and a new embellishment sewn over the top. I used a blue crochet ribbon, folded it into a bow shape, and hand sewed it to the top. I started this project at the Perle 8's Thursday night session, and finished it in front of the TV a few nights later.
Lucky my little toddler got to have some time out at the playground with her grandparents and aunty whilst Mum recovers. Here is the newly embellished top having a ball on the slides at the playground.
Sunday, February 21, 2010
Getting ready for winter - Kayla assymetrical jacket
Enough complaining.
The pattern is the Kayla hooded jacket from Ottobre 3/2009 issue (which I just noticed was their Summer issue, not even a Winter issue. That's what happens when you live so close to the arctic circle I guess). The fabric is a cotton blend fleece. Fluffy on the inside so good for winter (ie not now). Lined with hot pink cotton lycra in the hood. It was the first time I have ever used snaps (instead of buttons or a zipper) on the front panel and they were super easy. Finished with some hot pink binding.
I forgot to take a close up photo of the hem, but there is some twin stitching along the bottom jacket and sleeve hems. Gives it a very professional finish, but also caused some minor distress with a certain broken twin needle about 5cm before the finish line...
Monday, February 15, 2010
More legs
Thursday, February 11, 2010
My creative space with automobiles
Its all about automobiles, bright colours and summer.
But I can't show you the whole thing. Its a present for a friend. Or for their little dinosaur. So instead you get to see little bits and pieces.
It turns inside out. It has a nice stripey brim to shade out the sun.
What mysteries are going on in your creative space? Check out Kootoyoo to connect with others.
Monday, February 8, 2010
Cecile jersey blouse and more twin stitching

- Steam ironing is your friend. It did a great job on reducing the warped stretch of the neckline and arm ribbing. Not perfect, but over time, improving my technique and the steam iron and I should get this under wraps.
- The fabric generally stretched along the seams, particularly when top stitching. I washed the garment half way through and this seemed to straighten everything up again. On reflection, perhaps a go over with the steam function on the iron also might have fixed it.
- Reducing the tension when using the twin needle stopped the fabric from puckering between stitch lines.
- Shirring is easy peasy
Thursday, February 4, 2010
My creative space
I was THIS (imagine finger and thumb not very far apart) far from finishing - yes I mean finishing - my latest project. When one of the needles on my twin needle broke...
Just like that.
Very calmly, I managed to make it to my local haby store to pick up a replacement (plus a few other bits and pieces - making it worth the trip). But I was not impressed. Now the challenge of finding the time to finish it.
Head on over to our lovely My creative space host Kirsty at Kootoyoo for (hopefully) less frustration, more construction.
Saturday, January 23, 2010
Op shop treasures, waiting for some crafty love
Wednesday, January 20, 2010
summer tops
Friday, January 15, 2010
Learning to crochet - the beginning
So after about 1 hour I had this.
Monday, January 11, 2010
Confronting the inner crochet snob
We go away camping quite often. My skills and passion are mostly centred around my sewing machine so it is always a challenge for me to think of things I can do whilst I am away without electricity. I usually drag a couple of magazines along with me to flick through looking at pictures and getting ideas. And whilst I would hate to downplay the importance of pouring over beautiful magazines to stimulate the creative juices, it is hardly a replacement for actually making things.
So this camping trip I have decided to challenge myself.
I have a confession. I am a crochet snob. I have always thought it to be an old fashioned, out-of-date and something that nannas do. I have seen other people’s blogs showing their latest granny squares or other crochet creations and commented “lovely bright colours!” or ‘how creative!”, but I have always thought deep down, crochet is not for me. I do cool stuff, not crochet. I have seen a picture of somethingerother, and thought how cool and different it was. Then read the print underneath only to find out it is crochet, so I loose interest. Oh, I don’t think it is so cool after all – its crochet.
So now. I’ve decided its time to confront my inner crochet snob.
- Meet Me at Mikes craft book (a very thoughtful Christmas present) with Pip Lincoln’s ‘how to crochet’ instructions (this will also fulfil the need to pour over beautiful pictures and inspirational ideas without actually doing anything)
- a ball of lovely speckled yellow yarn
- a metal crochet hook (according to Pip, for ‘extra slipperiness’)
- my Mum who used to crochet once upon a time, who thinks that she might remember again
- a long weekend away with plenty of time for relaxing and fiddling around with learning new techniques
I am not sure what I want to make yet, but figure I will play around for a bit and see what turns out.
Wish me luck. If all else fails, by the end of writing this post I have finally learnt to type crochet rather than crotchet. So I have at least gained something!
Saturday, January 2, 2010
New born baby gift and getting my sewjo back
My brother in law and partner had a brand new little baby boy on Tuesday. To welcome little Ollie, I made a few things to make his introduction to the world a little nicer.
Friday, January 1, 2010
Happy New 2010!
The start of a new year and the start of a new decade.
I've decided to look forward to the new year rather than back to the year just past.
Although I should pay my dues to 2009 with a quick wrap up as it certainly was a significant year in my life. In 2009...
- I had my first year on maternity leave from a full time career. Because of this I rediscovered my creative flair and my love of sewing and making things. The Melbourne Stitches and Craft show was a real inspiration for me and got the ball rolling by introducing me to a whole new world of craft, blogging and some amazing people. (I honestly had no idea that such an amazing crafty community was out there!)
- In July I stopped being an anonymous blog peeper and started my own blog! I also joined the great Perle 8's group and met more amazing people.
- I had the pleasure of watching my friend Nic of Yardage Design make a dream come true in creating a crafty business from scratch. Nic is a real inspiration and has documented the whole journey on her blog. It is definitely worth checking out.
- In December by little baby girl turned one. It was time to return back to work, albeit part time.
So in 2010, there are more exciting challenges to come. The end of 2009 saw me going back to work, getting busy and just never finding the time for dragging out the sewing machine (although there were plenty of longing glances into the spare room cupboard where machines, stash and notions are all kept safe). Or turning on the computer to be inspired by all the bloggy creativeness. I have learnt my lesson many years ago on making aspirational and unrealistic new years resolutions that never stick.
This year I look forward to continuing my lovely blog, continuing to make and create lovely things, learning new techniques and finding new inspiration.
We have a house move/renovation/extension thingy to plan and do.
And finally I hope to find that balance between motherhood, wife, domestic goddess (did I say earlier I was going to avoid unrealistic expectations?), part time career, home renovation project management, and finding time for my passion for sewing and craftiness (plus all the other very important things).
So Happy New Year to you all! I look forward to joining in with your adventures in 2010 and I hope you enjoy being a part of mine!
Tuesday, December 15, 2009
Madness, a 1st birthday and blue food dye
We had our first ever 1st birthday party a week ago. It was a small affair, with plenty of good food, family and laughter. The baby (who is no longer considered a baby anymore!) got a new birthday dress for the day. (Yes, I was up till 11pm the night before finishing it, always leave everything to the last minute...) It did the trick for the beautiful sunny day that we had. The pattern was from the Ottobre Summer 09 magazine, the same Toffee Tunic as the one I made a while ago here. Except I omitted the sleeves (a time saving strategy as whilst they are cute sleeves, they took the longest to make). Here is the tunic in action, featured along with the blue icing smothered mouth and hands, after having devoured the blue layer of her piece of cake..
Wednesday, December 2, 2009
An oven makeover
Sunday, November 29, 2009
Knitted cardi
Baby Layette - one for the novice
This jacket, worked sideways in one piece, and in easy garter stitch, would be within the capacity of the beginner and would be useful for expectant aunts and grandmothers who may feel their needles have become a trifle rusty.
Monday, November 23, 2009
screen printing with contact
Although it hasn't been a time completely void of crafting (but it must have been very busy with some other very important things, I'm sure...) I got into a bit of screen printing, or the very easy do-it-on-the-dining-room-table method using contact (the clear adhesive plastic used for covering books with), a sponge roller and some fabric ink.
Two projects came to life. A t shirt for my hubby for his birthday and a little decoration for a plain top for the baby. The t shirt is my favourite as it is of our (beautiful lovely friendly) dog Max, who can be seen in the non 2D version on our last camping trip here. I enlarged and printed out a favourite photo of Max. Traced the outline onto the contact. Using a sharp blade, cut out the shape from the contact so you are left with a reverse out of the picture. Then, you hold the sheet of contact over the t shirt, very carefully pull away the backing from the contact whilst trying to stick the contact flat to your item to be printed. This is the trickiest part really, particularly if you have a large picture to print!. Then, once it is stuck down well, you roll or paint your ink in the cut out.
The print is then ironed from both sides, a lot! The fabric ink jar said to iron for 15 mins, but I can't imagine the fabric would have withstood that, so I just ironed it a lot. The pic is after it has been washed too, so obviously I ironed it enough to set the ink! (A quick iron might have made the final product look a little more impressive too, but I think I was all ironed out by that stage).
I'm sure there are plenty of good tutorials out there (with a few more photos - I always get so carried away in my projects, that I often forget to take photos until the very end!), however I learnt this simple technique at a workshop during the Melbourne Stitches and Craft Show from the very talented Tegan over at Ink & Spindle.The other print was the base of a daisy, inspired by a a small but obvious stain that I can't seem to remove in the wash. Not overly exciting yet, but this one is a work in progress, as I need to add some material and a bit of sewing to bring this to life. But the print is a start!